Mastering product manufacturing information (PMI) data for Metrology and Quality Control by
using Touch Probe measurements

Idea
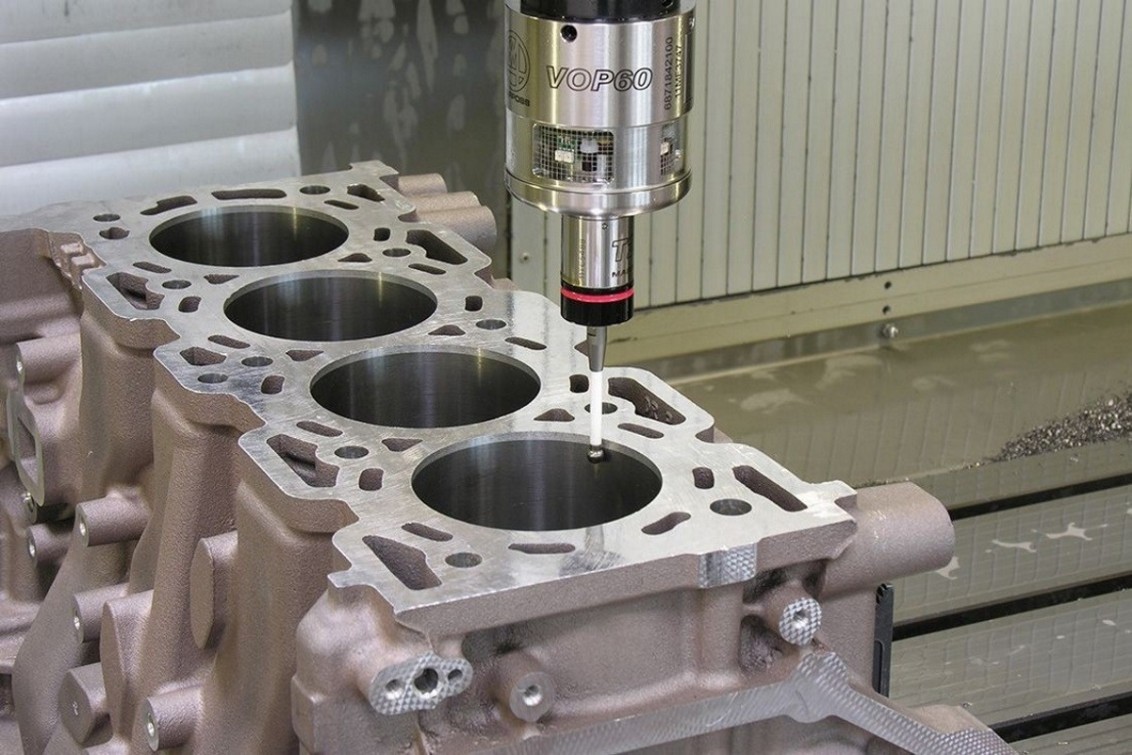
With traditional 2D drawing-based workflows, many tasks are processed manually, stealing skilled engineer’s time for such a common work. Manufacturing and quality control engineers manually enter and interpret Geometric dimensions and Tolerances into their CMM (coordinate-measuring machine), CAM (computer aided manufacturing), or CAI (computer aided inspection) software. Depending on the complexity of the part, it can take days if not weeks. Additionally in quality assurance, a high amount of idle time is generated by the programmed movements of the touch probe between the different measurement positions. This applies especially to complex components. For this reason, iNovAITec developed a 3D software (Inspection software) includes methods to improve the planning of alternative paths between measurement points/edges. To realize this approach an optimization algorithm improves the order of the individual points/edges to be measured.
Technology Solution
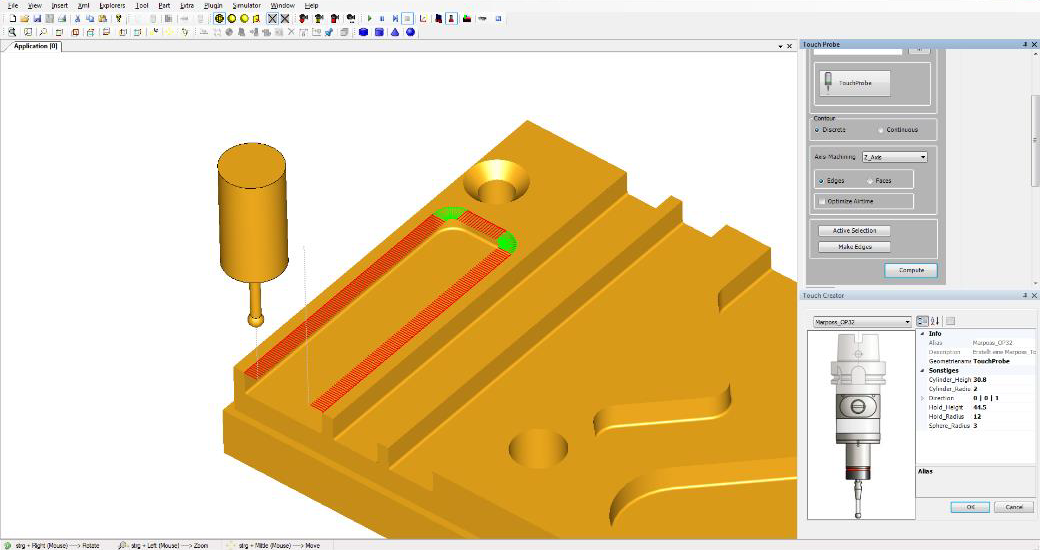
iNovAITec has developed a CAM Inspection software to create tool paths for tactile measurements. The software enables state of the art 3D visualization and processing of massive data used in modern metrology. The selection of the points/edges to be measured is typically performed by the user. For the automatic optimization of the measurement process, the sequence of operations are arranged in a way, that the traveling distance of the probe reaches a minimum. In this way, a time-optimal path for the measurement of the component is generated.
As an additional feature there are two different measuring modes: The first commonly used mode for tactile measurements is based on a sequence of measurement points which are processed one after another.

The second mode is generating continuous lines to scan a defined profile of the work piece.

Benefits
The main benefit of the Inspection software is the fast and interactive generation of measurement paths. Otherwise the benefit of this software is that the developed methods can be used not only for collision detection, but also for collision elimination by adjusting the tilt and lead angle of the touch probe. Moreover, the tool paths can be designed in a way that collisions between the tool and the workpiece can be avoided already in the process planning phase.
The software has already been used in combination with the MARPOSS G25 industrial touch probe during research projects (supported by Lufo Niedersachsen). According to the fact, that the G25 touch probe is able to acquire continuous measurement profiles these tools can be used to plan and operate measurements to determine the surface quality of complex structural components for the aerospace industry.
Industries: Aerospace Automotive Manufacturing Metrology and Quality Control CNC-Machinery
Contact
Do you have more questions?
Give us a call on: +49 (0) 176 310 693 62
or send an email to: info@inovaitec.com
We will do our best to answer your questions!
